


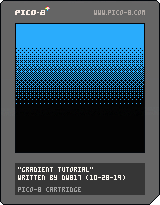
TO LOAD THIS CART, type the following in immediate mode:
load #dt |
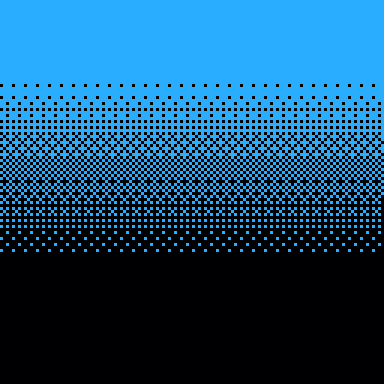
You've probably seen some pretty amazing things in graphic demos done for Pico-8, none to me more satisfying than the dither effect I've seen between two colors, where one side of the screen is black, the other white, and a complex and beautiful pattern between both showing a kind of fade ability using only the same-color pixels.
The fill pattern is by @Megus, and you can find his demoscene cart HERE:
https://www.lexaloffle.com/bbs/?tid=35774
Now while he and his crew have made an amazing demo, this tutorial and focus will be only on the dither technique used to create a division between two-colors. While it looks great on 3-dimensional models, it is also quite a thing of beauty to appear even on the screen just by itself.
So, exactly how is this being done ? And why is dithering an important element in graphics ?
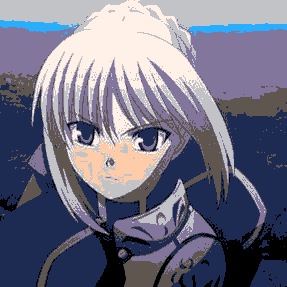
First off, Pico-8 has an ability to "shade" pixels automatically with the FILLP() command, so that is how it is being done. Why is it important ? They give the illusion of varying degrees of shade between two colors. Let's take this picture for instance:

Now let's first off convert it to Pico-8's palette:
Obviously it loses some of its quality. But what about this ? Where the picture is comprised of only two colors, black and white ?

While you can adjust the brightness to show more detail, you are still limited to the lost pieces that are too dark or too light to show.
So, how can dithering help this ? Let's see a few. Here is a dither using what is called, ORDERED. It's good, fast, certainly better than straight out B&W, but could be improved upon.
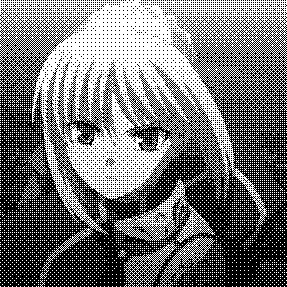
In fact improving this default has always been a bit of a science and artistic thing. Perhaps the most common and popular is the Floyd-Steinburg method thus:
.png)
A dramatic improvement. You can find more about this favored method of converting multi-color pictures to a smaller palette, or even just B&W as seen HERE:
https://en.wikipedia.org/wiki/Floyd%E2%80%93Steinberg_dithering
For further research there is also the Burkes and Stucki method, both included on this page:
.png) .
. .png)
https://en.wikipedia.org/wiki/Dither
But now let's get back to the code here.
What this does is create an array that holds 16-numbers. The dither table itself is stored in Sprites comprised of 4 8x8-pixeled sprites altogether. 8 4x4 patterns across at the top, and 8-more 4x4 patterns at the bottom, yielding 16 in all.
Each of them represent a "winking out" of each of the 4x4 pixels, where the BLUE pixel represents the pixel being added to the total "wink outs" so you can easily track them, or even develop your own. The background colors are there for a guide only.
|
|
[8x8] |
The current selection of pixels and which are added at what position are done SO in such a precise and perfect way that when spread across the screen, creates a beautiful dithering effect. Which of course can be used to render 3-dimensional objects in Pico-8 with varying degrees of shades to emulate the lack of hardware colors inherent to Pico-8, or can be used simply to create a nice transition between two colors.
See the sourcecode for more details, chock full of remarks on how to code and write your own rectangular dithers and to fully understand the command FILLP(). Thus ends the tutorial.
HOPE THIS HELPS !
 3 comments

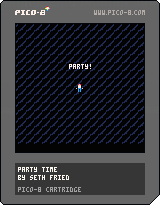
This is the result of the #imglygamejam19
We built that in 42h!
Okay, so not really the soundtrack so much as 2 tracks from Castlevania.


I made this horrendous well-programmed cart which corrupts itself when true=true.
Why did I do this?
I don't know, I'm just procrastinating on being a functioning member of society.
Disclaimer: it's dumb don't use it
TO LOAD THIS in Pico-8 type:
load #nine_keys |
I am not at all certain if Pico-8 runs 100% correctly on Android and cellphones. I would like to think that if it is not, that @zep is certainly doing his level best to ensure that it can.
This program is fairly simple but opens up input, especially for a touchscreen Android and touchscreen cellphone.
I had originally worked this into a complex cellphone driven programming language earlier with 15 buttons in a 5x3 format, but the language is cumbersome, slow, and not at all user-friendly.
So I have put it here. You can test it with the mouse if you like.
6 buttons are already active.
- Press the middle up for UP.
- Press the middle left for LEFT.
- Press the middle right for RIGHT.
- Press the middle bottom for DOWN.
- Press the top-left for INCREASE FOLLOWERS.
- Press the top-right for DECREASE FOLLOWERS.
Press (X) by itself to swap between showing the nine buttons or hiding them.
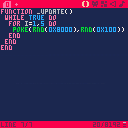
And of course this program is using standard _init(), _draw(), and _update() chock full of remarks to guide you. So you can reconfigure all 9 of these buttons for your use and their definitions and actions.
HOPE THIS HELPS !
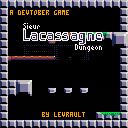
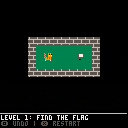
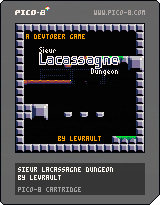
Sieur Lacassagne dungeon
Sieur Lacassagne dungeon is a retro Pico8 game made during the #devtober month (october).
Github right there
Music
Special thanks to this awesome musician that licensed is music under the Creative Commons.
Track is Dungeon from Pico8 Tunes Volume 1 made by [Gruber]( https://twitter.com/gruber_music)
Post mortem #devtober 2019
Ah October, month of spookiness and for month long hashtag challenge like #devtober. For those who are not aware of what #devtober is, it's a challenge created by ThisIsEllian and it the same thing as #inktober except you work on your game every day of October instead of your drawing. They are three simples rules
- Work an on a game you made (doesn't matter if it's a work in progress or a new game)
- Post on the #devtover hashtag on twitter your daily progress
- Write a post mortem on the 31st of October
You can found more details here
I found the concept awesome, so I decide to give it a try. I began my journey on the 6th (a little bit late I know) and manage to create my own little game in less than a month. I added my "own" restrictions to make the challenge more exiting to me:
- It must be a new game
- It must be created with something that I have never work with
- All art must be created by myself
That's how I ended up working and discovering the fabulous Pico 8 fantasy console and Lua at the same time. I decided to not be too crazy by choosing to make a 2D platformer. I wanted something fast, simple and fun. So Pico 8's old school restrictions were perfect for me.
That how Sieur Lacassagne Dungeon was created.

State of the project
I can call it a "success". The game is fully playable, has a solid 60 fps, does seem to be too much buggy and even got some great music (credit Gruber). Code seems to be "good", at least, good for someone that wrote his first line of Lua three weeks ago.
But it misses some features that I couldn't make during the given time.
- Not enough juicy, I wish I could have some basic particle effects and a momentum attack effects. I blame my lack of knowledge in game dev in general and the Pico 8.
- There is no story at all, the player is launched in the game.
- UI/Goal/Score could have been some cools features. Like a time attack mode, high score management with a cool little UI.
The game has been set in feature freeze the 24th October and I fixed a lot of remaining issues. I could work a little much longer on the feature but it would been too much on myself.
What went wrong
Not that much to be honest. I wish I could have been more innovative and make something that isn't a 2D platformer. But hey, it's like my first "game jam" ever and I wanted to finish my project. That why I defined a strict simple scope for the game features and focus more on the new technologies.
Beside was I already tell in the miss features in the section below, I considered this challenge a wonderful experience in my case. Playing the safe card with a type of game that I know well and setting up a strict scope was just benefic for me.
What went right
Almost everything!
First of all, the Pico 8 is a lovely engine to work with. The community is really kind too. I ask like two questions (here and here) and they were like "hey here a solution or hey, you need music, I can make you a tune if you want". I think I should be used to those kinds of cool devs, but it's always heartwarming to see people that like their little fantasy console and only want other people to discover it.
Pico 8 work with sharable cartridges with free access to the source code. What a wonderful system, it's was so easy to find some goods examples. Three cartridges got my attention and give me some incredible help to make the project:
- Advanced Micro Platformer - Starter KitBBSPICO-8Cartridges to start my game engine
- Pico-8 Tunes Volume 1 to get some greats music.
- Pico-8 SFX Pack! for the sound effects part
So this community system around Pico 8 was just a great opportunity to achieve the game during the given time.
Even the pixel art was pretty fast to create. I know, my sprites are only 8x8, but I never created something without real pixel art references. I was motivated to make everything of my own this time. And I did it! Yeah, it's pretty basic but they are my pretty basic pixel art sprites.

What's next
I'm going back working on Maximilien adventure a game made with the Godot engine for my nephew Maximilien. There nothing to say about it, I don't think I will improve Sieur Lacassagne Dungeon but I'm certainly gonna re-work with Pico 8 for my next game jam.
This experience was great and let me experience some shorts development times for games, something that I have never done before.

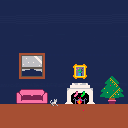
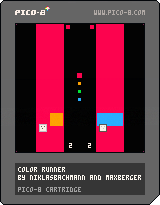
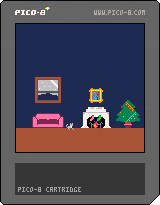
A simple simulator of the cat experience. You're in a room, it's warm and cozy while the snow falls outside, and you would be perfectly happy, if not for one thing.
That devilish, inexplicable red dot teasing you.
I'm sure it can not escape your hunting prowess.
I'm sure you can catch it.
I'm sure something will happen if you do, eventually.
...
...pretty sure.

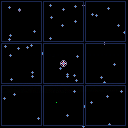
My friends and I created a new demoscene production for PICO-8 — PICOCHAK. It was first presented yesterday at CAFe'2019 demoparty. It took 2nd place in Console Demo Compo.
Code: Megus
Music: n1k-o/Stardust
Graphics: Diver/Stardust
The full source code (including some tools) is available on GitHub: https://github.com/Megus/picochak
Hi,
My game works fine here on the Pico 8 BBS (on desktop and mobile) but…
I recently uploaded it to itch.io, making sure to follow the instructions in the Pico 8 manual (https://www.lexaloffle.com/pico8_manual.txt):
If you would like to upload your exported cartridge to itch.io as playable html:

            1. From inside PICO-8: EXPORT -F FOO.HTML
            2. Create a new project from your itch dashboard.
            3. Zip up the folder and upload it (set "This file will be played in the browser")
            4. Embed in page, with a size of 750px x 640px.
            5. Set "Mobile Friendly" on (default orientation) and "Automatically start on page load" on.
                // no need for the fullscreen button as the default PICO-8 template has its own.
6. Set the background (BG2) to something dark (e.g. #232323) and the text to something light. |
But for some reason, on the itch.io mobile version, the controls 1) take a long 5 seconds or so to appear atop the game and 2) don't work.
Here's the working version on lexaloffle: https://www.lexaloffle.com/bbs/?tid=35622
And here's the one not working on mobile on itch.io: https://tailpipe.itch.io/tailpipe
Note: I'm using Safari for iOS.
Thanks in advance for any ideas of what I might be doing wrong.

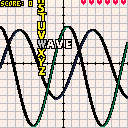
So I'm not much of a musician but I've had a soft spot for chiptune music ever since I first heard of the genre, so once I started messing around with PICO-8 it seemed like the perfect opportunity to try make something of my own. This is the first thing I've made that's sounded good enough for me to turn into a full song :)
Hope you like it, IMO it has some touches of Monodeer and Kubbi to it, for anyone who's listened to those artists.
Also big shout out to @Gruber for his YouTube tutorials that helped me figure out how to do anything at all in the music editor :)


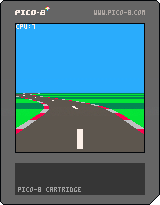
Pseudo 3D racing games are fun. They have a cool retro arcade feel, with a good sense of speed, and can run on low end hardware. Plus they're pretty straightforward to implement - and satisfying.
There are lots of different ways to write a pseudo 3D racer, but I'm just going to show you how I do it.
This is the method I used for Loose Gravel, and can render corners, hills, tunnels and background sprites in an efficient manner. It doesn't need any 3D drawing hardware, just basic 2D rectangles, lines, scaled sprites and rectangular clip regions. Pico-8 can do all of these.
Defining the road
The road is made out of "corners" (for our purposes we will call straight bits "corners" as well). Corners need to curve in the direction the road turns, so we will simulate this by building them out of smaller straight "segments".
We can define the track as an array of these corners.
road={
 {ct=10,tu=0},
 {ct=6,tu=-1},
 {ct=8,tu=0},
 {ct=4,tu=1.5},
 {ct=10,tu=0.2},
 {ct=4,tu=0},
 {ct=5,tu=-1},
} |
Each corner has a segment count "ct" and a value indicating how much the direction turns between each segment "tu".
So tu=0 creates a straight piece, tu=1 will turn to the right, -1 left etc.
For simplicity we'll ignore hills and valleys for now.
Drawing the road
We will draw the road by walking a 3D "cursor" along it and drawing the road at each point.
We'll define the cursor like this:
local x,y,z=0,1,1 |
We will start drawing the road slightly in front (z=1) and below (y=1) the camera position.
Note: I use x=right, y=down, z=into the screen as my coordinate system. I find this easiest to work with, having x and y in the same direction as on the screen and keeping z coordinates positive.
The direction of the road is another 3D vector:
local xd,yd,zd=0,0,1 |
So initially the road will point straight forward (zd=1).
The direction will be added to the cursor's 3D position to move from the current segment to the start of the next. To keep the maths simple we're using segments of length 1.
We also need to track which corner and segment we are drawing:
local cnr,seg=1,1 |
The main drawing loop will draw 30 segments of the road from the starting position, as follows:
- Draw the road at the current position
- Move to the next position in 3D space
- Adjust the direction based on how the road turns
- Advance to the next segment (and corner if applicable)
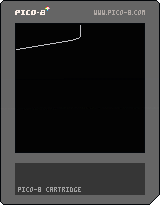
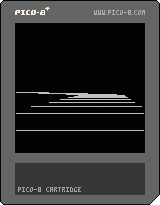
Putting this together, gives us something like this:
Click "code" up above to view the code.
It's just a static boring line for now, but the basic logic is there. I was pretty vague about what "draw the road" means so we're just drawing a line to the x and z coordinates of the "cursor" for now.
We can see that the road goes straight for a bit then turns to the left as it moves down the screen.
We're "adjusting the direction" by adding the turn amount for the current corner to the X coordinate of our direction vector:
xd+=road[cnr].tu |
which means we're actually skewing the road rather than rotating it. This is part of the "pseudo" in our pseudo 3D - the difference is if we were using proper rotation the road would eventually turn around and start coming back towards us - if it turned far enough - whereas with skewing it just keeps stretching out more and more horizontally.
Although less realistic, skewing is much simpler to implement, and means that the road will always face away from the camera, which makes drawing things in the right order a lot simpler. And as long as the corners aren't too sharp it's an acceptable approximation.
Making it 3D
The key making this 3D is called perspective projection.
This converts a 3D coordinate into a 2D screen coordinate. I won't bore you with the mathematics - there are plenty of other places you can find this information if you really want to.
The important thing is the formula, which is:
- px=x*64/z+64
- py=y*64/z+64
This gives a 90 degree field of view (FOV). Replacing the 64 in 64/z with a smaller value would give a wider FOV, or a larger value would give a narrower FOV. We'll stick with 64 however. The +64 moves everything into the center of the screen.
64/z is also a useful value to keep, because it is the scale factor for anything drawn at that position, such as scaled sprites, or the road width. So the project function will return this too:
function project(x,y,z) local scale=64/z return x*scale+64,y*scale+64,scale end |
With this we can replace the line drawing code in the main loop:
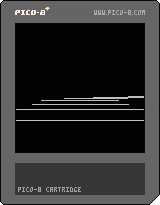
-- project local px,py,scale=project(x,y,z) -- draw road local width=3*scale line(px-width,py,px+width,py) |
The projection allows us to draw a horizontal line 6 units wide, scaled appropriately for the 3D position.
This produces something a little more like looking down a road.
Adding movement
Right now the road is static, because it is always drawn from the same position.
To get the sensation of movement we need to simulate a camera moving down the road, and draw it from the camera's position.
So we'll declare the camera:
camcnr,camseg=1,1 |
And change "cursor" in the _draw() function to start from the camera position:
local cnr,seg=camcnr,camseg |
We can use the same logic to advance the camera to the next segment as we do for the "cursor" when drawing, by moving it out into a function:
function advance(cnr,seg) seg+=1 if seg>road[cnr].ct then seg=1 cnr+=1 if(cnr>#road)cnr=1 end return cnr,seg end |
This advances to the next segment in the corner, and if necessary the next corner in the road, looping around to the first corner if required.
Then we call it from the _draw() function:
-- advance along road cnr,seg=advance(cnr,seg) |
And use it to advance the camera in _update():
function _update() camcnr,camseg=advance(camcnr,camseg) end |
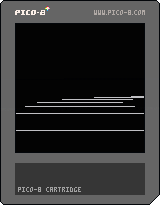
Putting it together we get:
Which sort-of looks like movement, but isn't totally convincing.
The camera is moving one full segment per rendered frame, which means the segment lines are rendered at the same distance each time.
We need to move less than a full segment per rendered frame, which means we need to track the camera position relative to the current segment:
camx,camy,camz=0,0,0 |
Now we can advance the camera by less than a full segment length:
function _update() camz+=0.1 if camz>1 then camz-=1 camcnr,camseg=advance(camcnr,camseg) end end |
Inside _draw() we start drawing relative to the camera position, by subtracting the camera coordinates from the starting coordinates.
local x,y,z=-camx,-camy+1,-camz+1 |
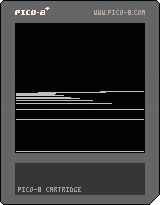
With these changes the forward movement feels more convincing:
But now cornering feels janky.
This is because the camera is always aligned exactly with the segment it is on, so when it moves to the next segment it snaps sharply.
To counter this we need to turn the camera smoothly towards the next segment's angle as it progresses down the current segment. We can compute this angle in _draw() as:
local camang=camz*road[camcnr].tu |
Then subtract it from the initial cursor direction:
local xd,yd,zd=-camang,0,1 |
This gives some improvement:
It's still not 100% though - there's still some horizontal juddering.
This can be a little tricky to understand the cause of.
The gist of it is that by turning the camera, we're skewing the first segment will be rendered. But when we calculate the cursor position relative to the camera, we're using the un-skewed camera offset. So when we draw the road forward again, the part that should pass through the camera point will actually be skewed left or right of it. This makes the camera appear to diverge from the path of the road as it moves towards the end of the segment. It then snaps back into the center when it progresses to the next segment.
To fix this issue we need to first skew the camera position in the "cursor" direction, then calculate the cursor position relative to the skewed camera position.
We'll start by creating a basic skew function:
function skew(x,y,z,xd,yd) return x+z*xd,y+z*yd,z end |
Essentially we're skewing the Z axis from (0,0,1) to (xd,yd,1).
We'll need to re-order the "cursor" setup code in _draw(), so that the direction is calculated first.
I.e. move this bit in front of the initial x,y,z calculation:
-- direction local camang=camz*road[camcnr].tu local xd,yd,zd=-camang,0,1 |
Then we can calculate the skewed camera position:
local cx,cy,cz=skew(camx,camy,camz,xd,yd) |
And calculate the initial "cursor" position relative to the skewed camera:
local x,y,z=-cx,-cy+1,-cz+1 |
This finally gives us nice smooth camera movement:
This is the core road drawing algorithm for a pseudo 3D racer.
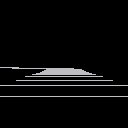
The last step is to simply clean up the rendering so it's not just white lines on black.
With a little bit of work we can turn it into something like this:
I won't go into too much detail here - you can refer to the cartridge code for specifics - I'll just touch on a few basic points.
To draw the road we need to render a trapezium (also known as a trapezoid). Essentially we're joining the horizontal lines together and filling them in. Pico-8 doesn't have a built in trapezium drawing function, but we can roll our own by stacking 1-pixel high rectangles.
We use alternating colours to communicate speed, which is a common technique in pseudo 3D racers. The easiest way to do this is to track how many segments we are along the road as a whole. Then we can use the modulo operator (%) to determine whether we are on an odd or even segment, or every 6th segment etc, and use that to select a colour.
We pre-calculate this (as "sumct") for each corner of the road in an _init() function. This makes it easy to calculate for any corner and segment:
function getsumct(cnr,seg) return road[cnr].sumct+seg-1 end |
We use this to alternate the ground colour every 3 segments.
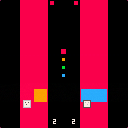
We don't have to stop at just drawing a plain gray road. The projected positions, trapezium drawing routine and colour alternation give us the tools we need to draw other road features. So we've drawn road markings as a thin trapezium every 4 segments in the middle of the road, and shoulder barrier things on the sides of the road, alternating red and white every other segment.
With the basic rendering in place this is a good time to tweak the parameters to get the right look and feel. The following adjustments were made:
- Moved the road start point to (0,2,2) in front of the camera
- Reduced the corner "tu" values, as the corners were too sharp
- Increased the movement speed from 0.1 to 0.3
Next steps
This feels like a good place to leave the first tutorial.
In part 2 we'll cover drawing roadside objects (and overhead objects) using scaled sprites.

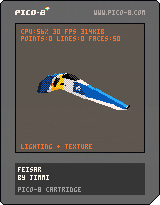
Demo of 3D lighting and texture mapping.

updated version without flicker:
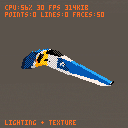
up/down/left/right - orient the model
z - toggle lighting/texture-mapping

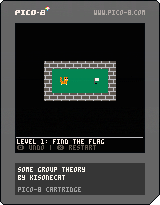
A block-pushing demo where the transformations are defined by certain blocks.
I just noticed the += shorthand doesn't work the way I expected with comma separated values.
For example:
x,y,z=1,2,3 x,y,z+=10,20,30 |
Sets x to 11 as expected, but y and z are set to 20 and 30 respectively, rather than 22 and 33.
Should the last line be equivalent to:
x+=10 y+=20 z+=30 |
?
Or is there some reason I'm missing?

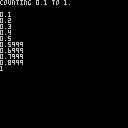
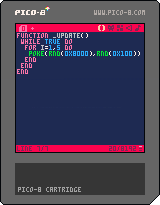
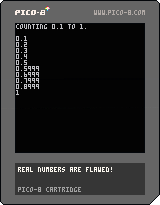
I was interested in making a type of high-number integer counter relying on the length and accuracy of 4-digit decimal numbers less than 1 when I came across this little slice of misfortune.
Here is the source to see there is no complication on my part:
-- real numbers are flawed!

function key()
  repeat
    flip()
  until btnp(4)
end

b=1
e=10

for i=1,5 do
  cls()
  ?"counting "..b.." to "..e.."."
  key()
  ?""
  for i=b,e,b do
    ?i
  end
  key()
  b/=10
  e/=10
end
?""
color(10)
?"complete!"
repeat
  key()
until forever
|
Any solutions on how to get the correct numbers here ? And ... does this error extend to LUA or just Pico-8 ?

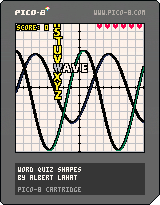
Following the vein of word quiz animals I have now made another version.
Code wise it now enables to use funcitons instead of sprites.
The drawing function do not use any global variable besides the tick number (tick+=1 every _update()).
Any suggestions would be welcome.
To do:
better mainpage.
MOAR shapes.
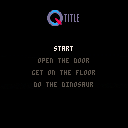
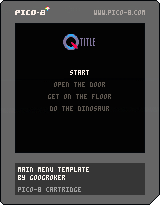
A free-to-use template for a main menu system, at only 106 tokens! (130 includes the example menu items). Simply edit the mbutts list to add your own options. I encourage you to adapt and modify the code (it's pretty vanilla right now and in dire need of beautification from a bright young go-getter like yourself).

Here's a simple Celeste mod.
Gemskip is possible.
